


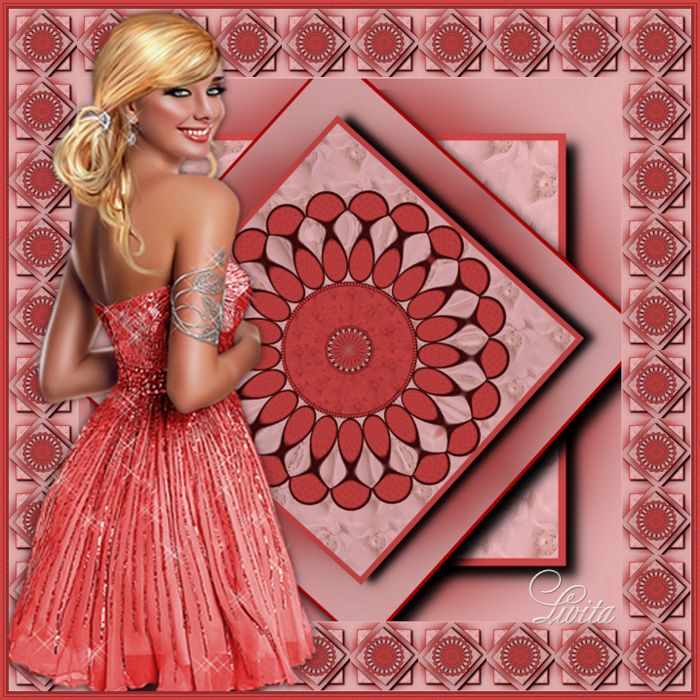
-
Par Livita le 25 Décembre 2020 à 07:53
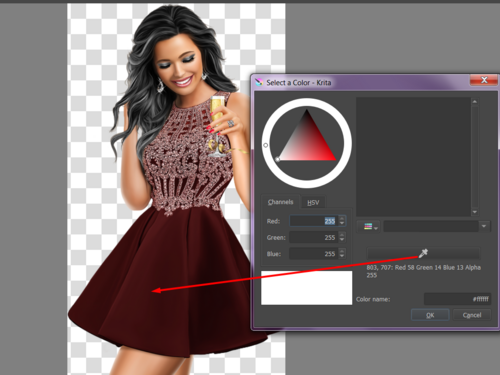
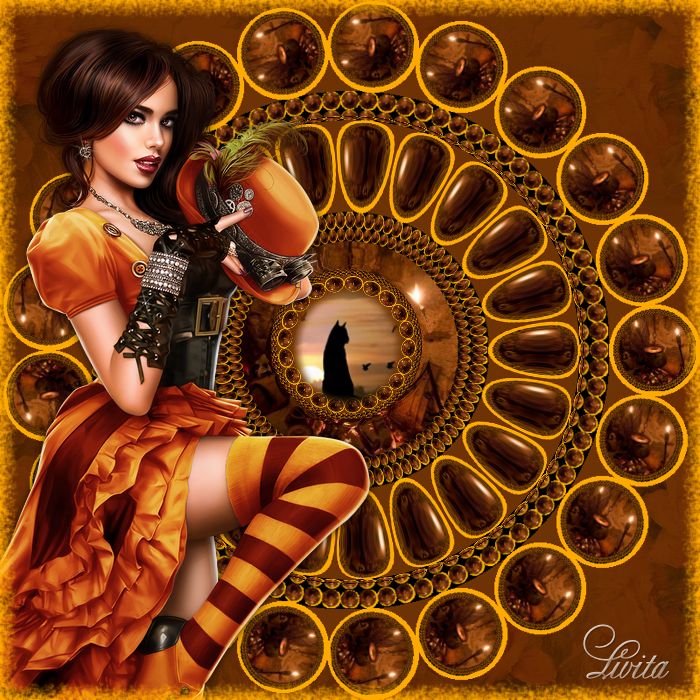
1- cor para o trabalho tirada do tube


2-novo documento

3- medidas- 700px-700px

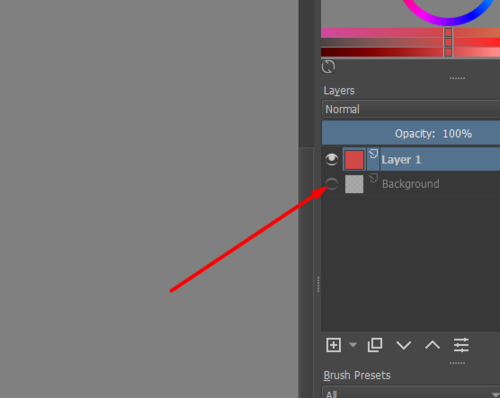
4-preencher com cor a camada de cima, a transparent

5-bloquear a camada de baixo-background
6-com o mouse do lado direito juntar as camadas

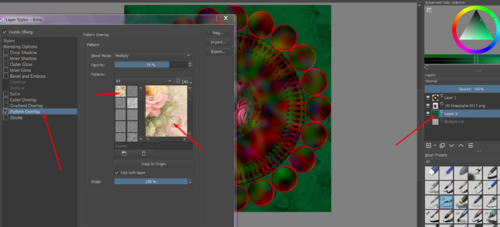
7-adicionar textura
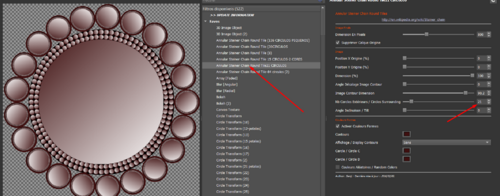
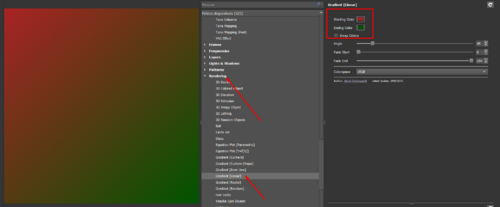
layer-layer style

8- se prefere uma textura ao seu gosto vá buscar ao seu computador

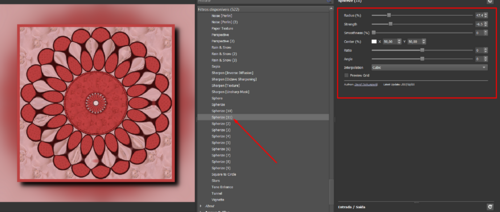
9-Filtro annular

10- filtro annular com circulos maiores

11-escolha outra cor

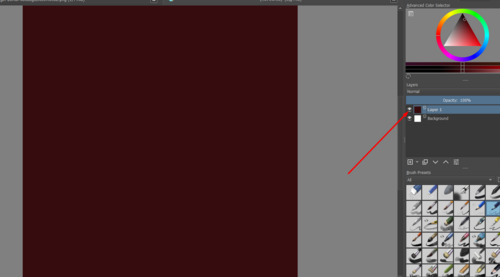
12-adicione uma nova camada e preencha com a cor
adicione textura

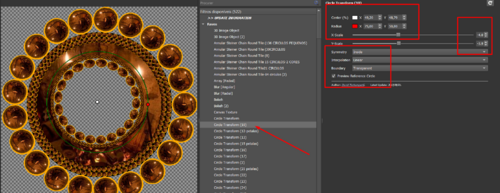
13-deformations circle transform

14-frame blur

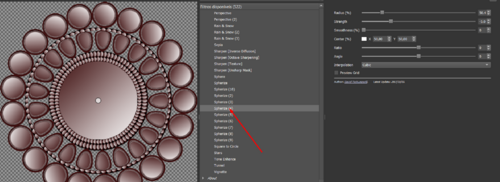
15- deformations spherize
16-frame blur
Veja o valor ANGLE ( - 47.8 )é importante para fazer a forma de losango
Se na sua imagem não ficar correto, terá de acertar os valores.

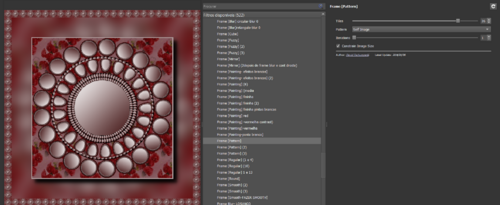
17-frame pattern

18-light e shadows-drop shadow 3D
Adiciona um tube e fique nesta camada.
shadow no tube

19-frame painting

Há quem tenha dificuldades para adicionar um tube.
Eu arrasto para o programa com o mouse e faço insert a new file layer
E com a ferramenta tranforme posiciono o tube.
...........................................
Mas pode ser feito de outra maneira
1- open

2.. select all

3-copy

4- paste

5- transform

6 -posicionar o tube , aumenta ou diminua

 votre commentaire
-
Par Livita le 25 Décembre 2020 à 03:02

1- novo documento

2- medidas de 700px por 700 px

3- preencher a camada transparente com uma cor
4- rendering- gradient linear
Escolha a cor do seu tube


COPIA O CÓDIGO DA COR E FAZ O GRADIENT


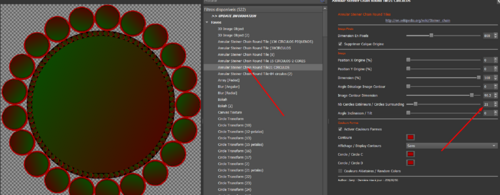
5- ANNULAR COM CIRCULOS PEQUENOS
BLOQUEIA A CAMADA BACKGROUND
TRABALHE NA CAMADA DE CIMA, A TRANSPARENTE.

6- REPETE O ANULLAR COM CIRCULOS PEQUENOS COM AS MESMAS MEDIDAS DO PONTO 5

7-ANNULAR COM CIRCULOS MAIORES
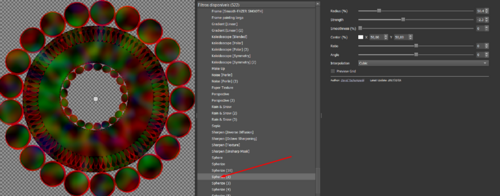
8-DEFORMATIONS SPHERIZE
9-ADICIONA UMA NOVA CAMADA
PREENCHE COM COR.
E ADICIONA UMA TEXTURA
JUNTA AS CAMADAS-LAYER FLATTEN IMAGE
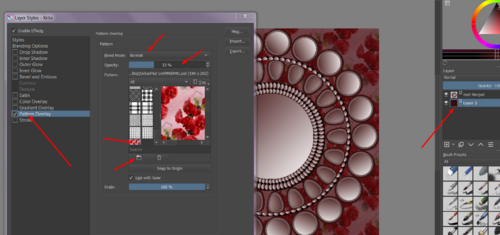
10-FRAME PATTERN
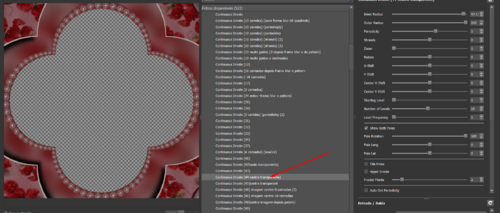
11- DEFORMATIONS CONTINUOUS DROSTE

12- ADICIONA UMA IMAGEM PAISAGEM

13-SE A SUA PAISAGEM NÃO PREENCHER A PARTE TRANSPARENTE :
ADICIONA UMA NOVA CAMADA E PRENCHE COM COR .
MUDE O BLENDING MODE DA PAISAGEM AO SEU GOSTO SE ACHA NECESSÁRIO.
SE A SUA PAISAGEM FICAR BEM AVANCE OS PASSOS 13 E VÁ PARA O 14.
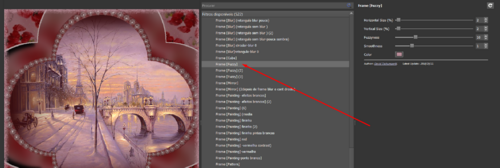
14-FRAME FUZZY
15- FRAME PAINTING
 votre commentaire
-
Par Livita le 25 Décembre 2020 à 02:15

1- novo documento
2- medidas de 700px por 700 px
3- preencher a camada transparente com uma cor
4- rendering- gradient linear
Escolha a cor do seu tube
COPIA O CÓDIGO DA COR E FAZ O GRADIENT
5- ANNULAR COM CIRCULOS PEQUENOS
BLOQUEIA A CAMADA BACKGROUND
TRABALHE NA CAMADA DE CIMA, A TRANSPARENTE.
6- REPETE O ANULLAR COM CIRCULOS PEQUENOS COM AS MESMAS MEDIDAS DO PONTO 5
7-ANNULAR COM CIRCULOS MAIORES
8-DEFORMATIONS SPHERIZE
9-ADICIONA UMA NOVA CAMADA
PREENCHE COM COR.
E ADICIONA UMA TEXTURA
JUNTA AS CAMADAS-LAYER FLATTEN IMAGE
10-FRAME PATTERN

11-FRAME BLUR

12- FRAME PATTERN

13- POE O TUBE E APLICA DROP SHADOU 3 D AO SEU GOSTO
14- FRAME PAINTING
 votre commentaire
-
Par Livita le 24 Décembre 2020 à 19:08

1- new document

bloqueie a camada background
Fica na camada transparente.
Preencher com cor a camada transparente

2- rendering gradient
Escolhas as suas cores.
3-annular

3-annular
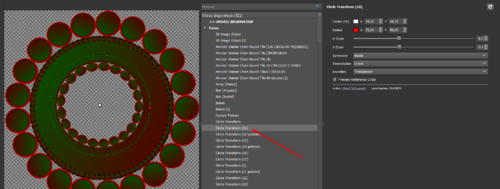
4-deformations circle transform
5- degradations- noise perlin

6- deformations Spherize
7- ponha uma imagem no centro

8-adicione uma nova camada
Preencha com cor e adicione textura
9-duplicar a camada da textura

10- deformations perspective

11- light e shadows- drop shadow 3 D

12- com a ferramenta transform desça a imagem

junte todas as camadas
layer- flatten image
13- frame pattern

14-frame painting
 votre commentaire
-
Par Livita le 24 Décembre 2020 à 18:01
1- annular

2- outra vez o annular

3-annular com circulos maiores

4-deformations circle transform
5-adicionar nova camada
preencher com cor
juntar as camadas

6-deformations spherize

7-adicionar textura

8- juntar as camadas
layer- flatten imagem
9- frame painting fuzzy ou painting ao seu gosto.
votre commentaire Suivre le flux RSS des articles de cette rubrique Suivre le flux RSS des commentaires de cette rubrique


